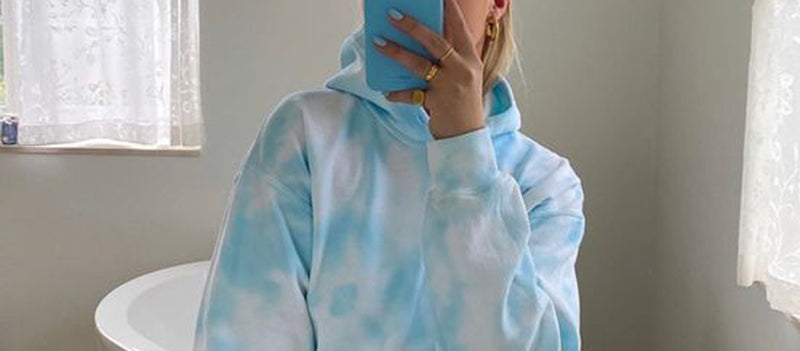
Once the fashion statement of the hippie culture, the tie-dye trend has gone a long way and made a big splash in 2020 at the height of the pandemic. Now, it’s seen as a dominant design in many fashion house runway collections. Even global celebrities like the Hadid sisters, Jennifer Lopez, and Kendall Jenner have been spotted in tie-dye attires.
Fashion experts say that tie-dye found its relevance again when people are revisiting their spending habits and finding ways to get more creative. It’s a fairly easy and economical way to channel your creativity and repurpose old clothes to turn into something new. With more people proudly sporting this new design on social media to stay “on trend”, here’s an easy DIY tutorial on how to create your own tie-dyed shirt.
Prep your supplies
Tye-dying is fun, but it can also get messy. Here are the essentials to start.
- A cotton shirt that you don’t mind messing up
- A bucket of water - ensure you have enough for your different color dyes.
- Surgical gloves - to keep the dyes from staining your hands and nails.
- Rubber bands - this is very important as this will create the tie-dye design that you want.
- Apron - To keep your clothes safe from stains.
- Color dyes - You can use a single color, multiple ones, or even mix and match tones to develop a new shade. Use 1 teaspoon of dye for every 1 cup of warm water.
Soak and tie it up, aka DIY your design
Soak the garment in warm water for 20 minutes. There are a variety of tie-dye patterns to try but the most common are the bull’s eyes, swirls, and scrunches. Use rubber bands to wrap the different parts of the damp shirt.
Ready your color dyes

Source: Pinterest
For bolder shades, opt for more dye and less water. If you prefer pastel shades, add more water vs. color. You may start with 1 teaspoon of dye for every 1 cup of warm water and make adjustments from there.
Start the process

Source: Pinterest
Pick up your plastic squeeze bottle and start applying the colors carefully and slowly. Turn the banded fabric as you use the dye to ensure that the cloth is all colored up properly.
Plan the arrangement of tones before actual application. Complementary shades tend to clash when mixed, so have a bit of spacing between the two shades so they can properly bleed into the white parts. Your rubber bands must be tied tighter if you want more whites to appear on your shirt.
Finishing up

Source: Pinterest
Get a large zip lock bag and put it inside the dyed shirt, and let the colors settle in. Wait overnight. When you feel happy with the result, remove the shirt from the zip lock bag and rinse under hot water.
Prepare to wash and dry. Do not mix your newly tie-dyed shirt with light-colored garments to prevent the colors from bleeding out onto the other clothes. Use hot water to wash. Once done, leave it out to dry. Voila!
You now have your very own tie-dyed shirt!

